Your fees stopped. The position looks fine, the tokens are all there, and nothing is accruing.
Almost certainly the price has moved outside the band you chose. Your money is not stuck and nothing is broken. It is simply no longer part of what traders can trade against.
By the end you will know what you are holding now, what each day out of range costs you, and how to decide between waiting and moving.
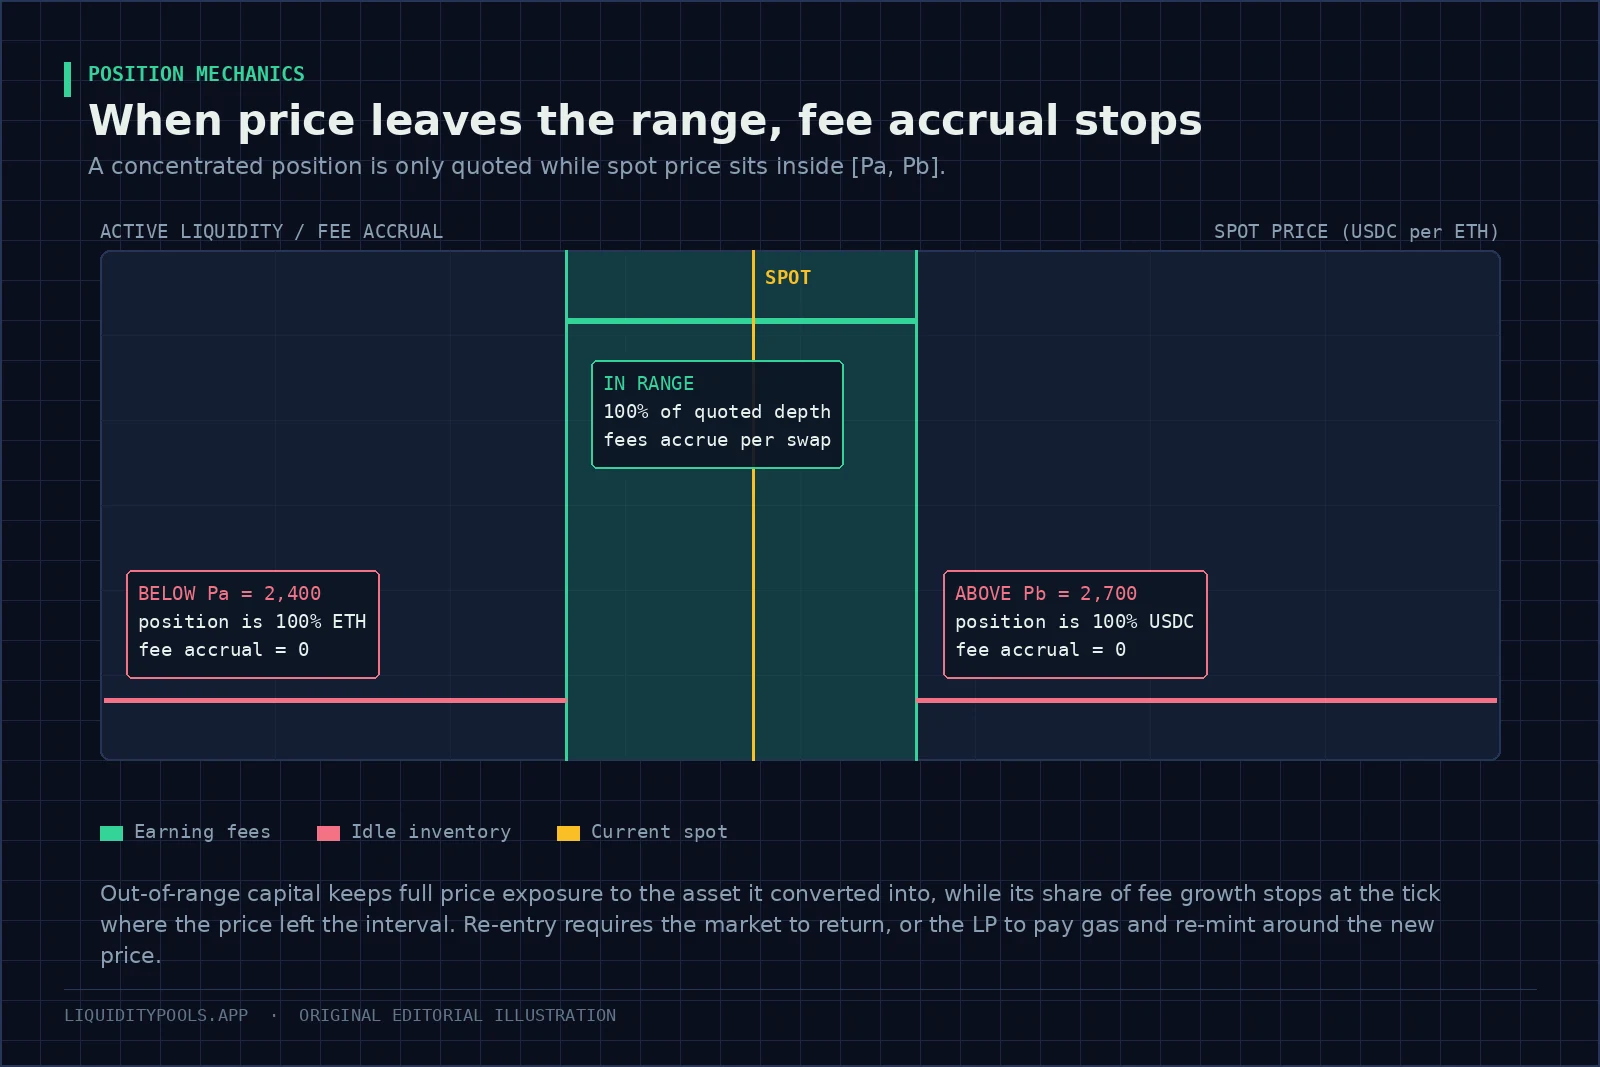
Key point: Going out of range is not the mistake. It is the expected result of the width you chose. A pair that moves 80% a year moves about 4% on a typical day, so a plus or minus 3% band on it will, on average, touch an edge within about half a day. That can be fine, if the fees earned inside pay for each re-centre. Work that out before you mint.
What the contract actually did
Your position is defined by a size and two prices. Inside them it holds both tokens, and how much of each depends on where the price sits[1]. The machinery behind those ranges is covered from the ground up in Uniswap Liquidity Pools.
The amount of the risky token you hold shrinks as the price climbs toward your upper bound.
Where:
- is how much of the risky token you hold.
- is your position’s liquidity, a measure of its size.
- is the current price.
- is the top of your band.
As the price rises toward the top, the two terms in the bracket converge and your holding of the risky token goes to zero. You hold only the quote token. Fall to the bottom of the band and the reverse happens: you hold only the risky token[6].
So crossing the boundary is not a sudden event for your token mix. It is the end of a rotation the pool has been doing the whole time, one trade at a time.
The fee side, though, is a switch. You earn only while the price is inside your band[6]. Once it passes your top bound, trades fill against other liquidity, and you get nothing. Fees already earned stay yours. The position itself, a non-fungible token under the ERC-721 standard, stays in your wallet, and you can withdraw it in any block[1][2]. The constraint is the price you exit at, not access.
See Concentrated Liquidity Explained.
What it looks like in numbers
A $20,000 position on ETH against dollars, opened at $2,500, with bounds at $2,375 and $2,625. That is a plus or minus 5% band, at the 0.05% tier.
| Price | What you hold | Worth | Earning | |
|---|---|---|---|---|
| You mint | $2,500 | 3.90 ETH and $10,247 | $20,000 | Yes |
| Drifts up | $2,560 | 1.99 ETH and $15,074 | $20,176 | Yes |
| Hits the top | $2,625 | 0 ETH and $20,241 | $20,241 | Stops here |
| Keeps running | $2,900 | 0 ETH and $20,241 | $20,241 | No |
Two things stand out in that last row.
You stopped tracking ETH. Helpful in a crash, costly in a rally. Against simply holding the original basket, you gave up the gains on the 3.9 ETH the pool sold on the way up. That basket would now be worth $21,560, while your position is still $20,241, a shortfall of about $1,320, or 6.1%. That shortfall keeps growing for as long as ETH keeps rising.
Every block above $2,625 earns nothing on $20,241 of capital.
Put a number on the second one. Suppose the pool trades $8M a day through your band, against $4M of liquidity there including yours. At the headline 0.05% fee you were making about $20 a day. If Uniswap’s protocol fee is switched on for this pool, providers receive 0.0375%, so about $15 a day[7]. Ten days out of range costs $150 to $200 in income you did not earn.
Now compare that to moving. It is not just gas[8]. Closing locks in your current token mix, and re-minting means swapping into the new ratio, which pays a swap fee plus price impact — how far your own swap pushes the price against you. See Range Orders on AMMs.
The number that tells you if your width was right
Time in range. You can only measure it after the fact, against what the pair actually did.
- Your own history: Revert Finance reconstructs a position and shows time in range, fees collected, and how it did against holding. Start here.
- Where everyone else put their money: Dune Analytics shows the liquidity distribution. If your band overlaps a crowded one, your share of the fees is diluted even while you are in range.
- How much the pair actually moves: compare your band width to trailing volatility. A band narrower than one typical daily move will leave its range constantly.
- Whether the pool earns enough at all: DeFiLlama publishes fees against pool size.
Daily income is the providers’ fee rate, times the volume through your band, times your share of the liquidity there, times the fraction of the day the price spends inside. Three of those four are outside your control. The width is the one you set, and it decides the fourth.
Research on real Uniswap v3 positions finds results vary widely, and that the larger returns go to providers who accept more risk and manage actively[5]. Uniswap’s own risk guidance lists out-of-range time, and the network cost of managing a range, alongside impermanent loss (the shortfall against simply holding the tokens) and contract risk[3].
What to do when the fees stop
- Confirm it is actually out of range. Compare the pool’s current price to your bounds. If the price is inside and fees are still flat, your problem is volume, not range.
- If it is inside and earning little, check your share. A large depositor adding liquidity in the same band dilutes everybody proportionally.
- If it is outside, classify the move. A spike around a news event, or a repricing that has held for days across markets? The first argues for patience, the second does not.
- Price the rebalance before you do it. Gas, plus the swap fee, plus price impact. Compare that total with what the new band plausibly earns over your holding period, after what arbitrage takes from it[4].
- Ask whether this pair still suits a narrow band. If volatility has doubled since you minted, last month’s width will leave its range far more often this month.
- Consider a wider band. Not everybody wants to manage a position actively. A wider band earns less per dollar but stays in range longer, and can come out ahead after gas.
See How to Evaluate a Liquidity Pool and Liquidity Pool Risks.
What to settle before you mint the next one
- Work out what you hold at both edges, and confirm you would be content with either.
- Compare the width to how the pair has actually moved over seven and thirty days.
- Estimate daily income from real volume and real in-band liquidity, not from an advertised annual rate.
- Cost one rebalance, then compare it with a typical week’s expected fees. If one rebalance eats most of a week’s income, the band is too tight for your size.
- Decide the rule now. A price trigger, a time trigger, or a decision to leave it alone.
- Set an alert before the edge, so you do not discover the exit weeks later.
Out of range is not a malfunction. It is the cost of the efficiency that made the narrow band attractive, and it should be priced before you deposit rather than diagnosed afterwards.
Price your next band before you mint
Rerun this guide’s example with your own numbers: fees in the liquidity pool fee and APR calculator, and the shortfall against holding at each edge in the impermanent loss calculator. If you use bin-based pools on Solana, Meteora DLMM Strategy applies the same decision to bins.
References
- Uniswap v3 Core Whitepaper (Adams et al., 2021)
- ERC-721: Non-Fungible Token Standard (Ethereum Improvement Proposals)
- What are the risks when providing liquidity? (Uniswap Labs)
- Automated Market Making and Loss-Versus-Rebalancing (Milionis et al., 2022)
- Risks and Returns of Uniswap V3 Liquidity Providers (Heimbach et al., 2022)
- Concentrated Liquidity | Uniswap Developers
- Fees | Uniswap Developers
- Ethereum gas and fees: technical overview | ethereum.org
Frequently asked questions
Why is my Uniswap v3 liquidity position not earning fees?
Almost always because the spot price has moved outside the range you selected. A concentrated position is only quoted to traders while price sits between your lower and upper bounds. Outside that interval the position holds a single asset, contributes no depth, and accrues no share of fees.
What happens when liquidity goes out of range?
The position converts fully into one of the two assets: entirely the quote asset if price rose through your upper bound, entirely the base asset if price fell through the lower bound. The tokens are not locked or lost, but they stop earning until price returns to the range or you withdraw and re-mint around the current price.
Should I rebalance an out-of-range position?
Only when the expected fee income from the new range clears the cost of exiting, swapping and re-minting. In choppy markets that tend to come back, waiting is often cheaper than paying to chase the price; after a lasting repricing, waiting simply extends the period of zero income.
Do out-of-range positions still carry price risk?
Yes, and it is concentrated. An out-of-range position holds 100% of one asset, so it takes the full price exposure of that asset with none of the fee income that paid you for holding it.
Why am I not earning fees on Uniswap v3?
Because the pool's current tick is outside your position's bounds. A concentrated position is only quoted to traders while price sits inside its range, so outside it the position holds one asset and accrues no share of fee growth.
What happens when liquidity is out of range?
The position converts fully into one of the two assets, keeps the full price exposure of that asset, and stops earning until price returns to the range or you withdraw and re-mint around the current price.
Continue in this track
This is guide 8 of 17 in LP Mechanics.
Next: Range Orders on AMMs: How Liquidity Can Express a Price View →
Previous: ← Concentrated Liquidity Strategy: Choosing a Range Width
See the full track sequence, or browse all 59 guides.